
Frequently Asked Questions About LED Neon, LED Neon Strips and LED Neon Signs.
LED NEON How is LED Neon made? LED Neon is made out of two important materials which are LED strip lights and silicon tubes. At

LED Neon flex is mostly high-quality silicone. They are fire-resistant and very flexible. The higher durability, energy efficiency, safety, portability, and lifespan make LED Neon flex a trendy choice among the users. Its applications include façade lighting, contour lighting, cove lighting, backlighting, etc.
LED Neon is consisted of:
Now, let us have an in-depth detail of how LED Neon is produced in two parts.
LED Strip lights are printed circuit boards (PCBs) wielded together to get the desired length. To mount LEDs and other components on the board, printed circuit boards (PCBs) use a surface-mounted technology (SMT) assembly process.
Let us analyze the process in detail.
In the first step, LEDs and other components like resistors are placed on a reel. When all the components are placed simultaneously on the board, it ensures an efficient pasting on the board.
A spectrophotometer is commonly used to sort LEDs based on current, voltages, and color. After sorting the LEDs, a dehumidification process is used to absorb all moisture. When the LEDs are ready, vacuum bags are used to protect them from humidity and dust.

In the second strep, LED components are pasted on the printed circuit board (PCB). The process through which LED components are pasted is called solder paste printing. Solder paste has three main ingredients: Steel, Silver, and Copper. Steel is the major contributor in solder paste printing, whereas Silver and Copper have a minute share in the formation of solder paste printing.
A mechanical fixture is used to hold the PCB and stencil still. Meanwhile, an applicator is used to paste the solder on mounting places where components are meant to be mounted. This process is done so precisely to evenly distribute the solder paste to exact places on the PCB. When the stencil is removed, an evenly spread layer of solder paste is printed on intended locations.

After the solder paste is applied, surface mounted technology (SMT) machine put the components on the printed circuit board (PCB). In the recent past, this process has been done manually, but now with technological advancement, a robotic device is used to place the components exactly where they need to be.


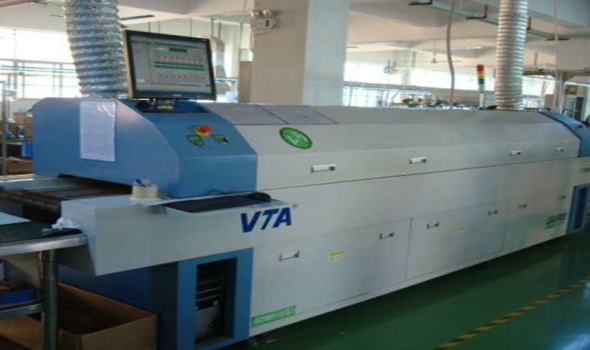
When the components are placed on the printed circuit board, you need to ensure that they stay there for a reasonable period. This is done by a process called Reflow Soldering.
In this process, PCB and pasted components are put on a conveyer belt that takes PCB to a reflow oven. The temperature inside the oven is used to melt the solder inside the solder paste, and then a series of coolers are used to solidify the solder again. This heating and cooling process creates a permanent bond between LED components and PCB.
After coming out of the oven, LED lights are usually 50 cm strips. These strips are then welded to any desired length. This process is either done manually or by machines. After welding the strips, a quality test is done to ensure that LED lights are working fine, and there are no open circuits. Also, a brightness test is done to make sure that quality is not compromised during the process and desired results have been achieved.

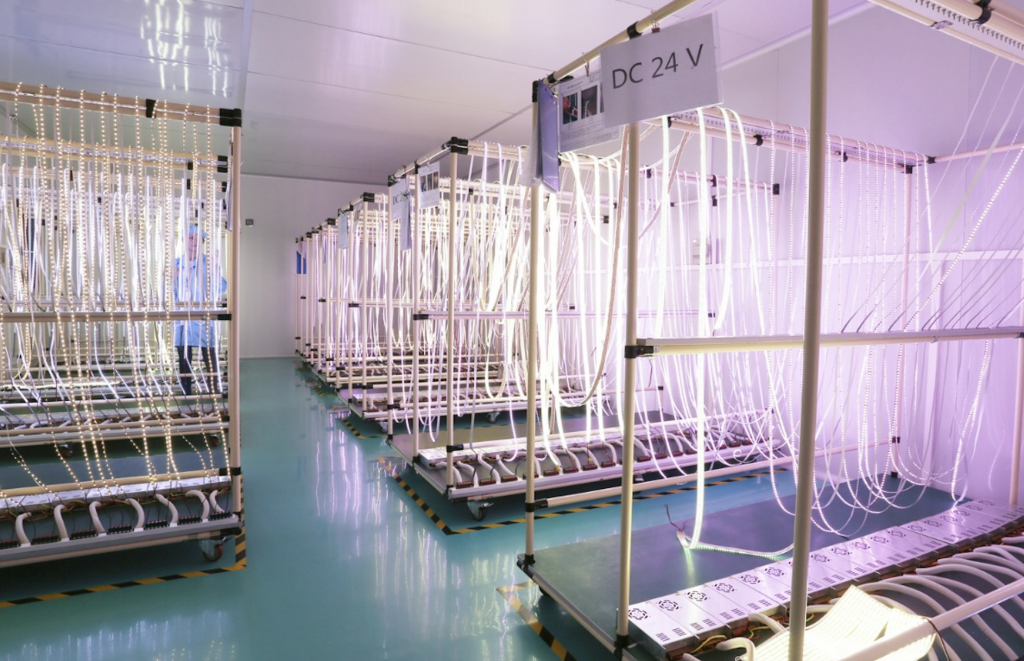
LED strip lights are put on a process called aging to check their efficiency, brightness, current, etc. In this process, LED lights are kept on for 12 straight hours to check whether the working is up to the mark or not. If any problem occurs, troubleshooting is done to sort out the issue before mass production of LEDs.
LED lights are put through a process called waterproofing to prolong their life span. In this process, LED strip lights are covered with Silicone or plastic. In some cases, LEDs are covered by both Silicon and Plastic too. LED strip lights can be covered either by manual way or by using machines.
In the end, surface inspection is done to ensure that everything is in place as desired.
Numerous factors affect the quality of LED strip lights, which you should be aware of while choosing the LEDs for your domestic or commercial use. These factors include:
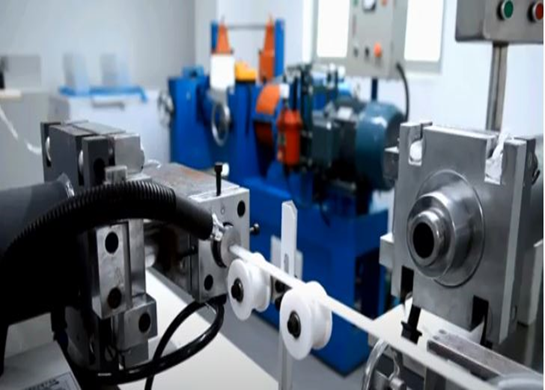
There are two main methods to produce Silicon Tube for LED Neon Strip.
Let us discuss these methods in detail.
The manual way is like connecting LED Neon strips manually at home. This process is mostly used in the domestic domain and not in commercial use because it takes a lot of time to produce LED Neon strip. Also, an ultra-long LED Neon strip cannot be produced by this process due to the limitation of the process. The process in simple steps can be described as below.
For this process you need the following things:


Silicon tube with one side transparent and one side white is used which not only give an aesthetic look but also inside lights can also be seen only when they are being used. A pusher is used to send LED Neon in the Silicon tube and end caps are sealed after that.
From the process, it is clear that the ultra-long LED Neon strip cannot be produced from a manual way because we can solder and connect LEDs only to a limited number.
This is how the latest technology makes LED Neon flex durable and makes ultra-long LED Neon flex. This process can be defined in some simple steps:


As a very popular application product for LED neon strips, LED neon signs look amazing. Many people are also very curious about how it is produced?
1. LED Neon sign manufacturing process starts with a design on Corel Draw (CDR) or Computer-Aided Design software (CAD).
So, you can send us your design drawing or only just tell us what about do you want, we can design it for you as you want.
2. Computer Numerical Control (CNC) laser machine is used for carving backboard. LED Neon tubes are cut to the right length for each part.

3. After that, the wires are soldered with an LED Neon tube, and then wires are cut to the desired length.

4. Fast connecting pins can replace soldering job. For outdoor use, waterproofing is done by adding silicone gel for each end. Paint glue at the end of the LED Neon tube and apply glue at the neon tubes’ fixing point.

5. In the last step, stick the neon tube on the gap of the backboard quickly. Now, the LED Neon signs are ready. The aging test is done as a quality test. If the test is successful, LED Neon signs are ready to be delivered in mass quantity.
The step by step process can be described as:
LED NEON How is LED Neon made? LED Neon is made out of two important materials which are LED strip lights and silicon tubes. At

Dimming LED strip lights have become increasingly important for many lighting applications, from residential homes to commercial buildings. With traditional incandescent lights, dimming was achieved by

Lighting is one of the essential aspects that matter indoors as well as outdoors, so many things need consideration when choosing the kind of lighting

If you look at the variety of lights around you, you will have plenty of options to look forward to. Especially if you have seen

Smart LED lighting is a revolutionary and fascinating trend in the lighting industry. We have written all that you need to know about it in this post.

The aesthetics and functional application of LED Linear lights keeps expanding with technological advancement. Check out the reasons why LED Linear became people’s choice and it’s amazing future trends.