
Frequently Asked Questions About LED Neon, LED Neon Strips and LED Neon Signs.
LED NEON How is LED Neon made? LED Neon is made out of two important materials which are LED strip lights and silicon tubes. At


Everything You Ought to Know About Connecting the LED Strip Lights
New to the fantastic LED strip lights and looking for a convenient way to set them up? This post will help you understand and guide you appropriately. We will cover all the appropriate methods you can use for all standard setups.
Converting LED strip lights requires you to figure out the perfect way to provide power into the LED strip appropriately for it to light up. There are different methods of setups that depend on where you purchased your LED lights. This guide is meant to cover all the typical steps and directions you can use effectively for all LED Connecting.
LED lights are efficient and environmental friendly yet still provides you with perfect lighting solutions. They come in different varieties, such as color and size. Most people currently use LED lights to light up unique and unusual places that the traditional light could not light up. The lights are also flexible to allow you to be creative and create your incredible lighting project.
It may be overwhelming to choose the flexible LED ribbons light that will efficiently light the site you have in mind. The task is very tricky for some people who find it very daunting. However, it is effortless to follow this guide and implementing the simple steps explained here. You can manage to use a connector and do the job alone with no compromise.
Some lighting projects may require LED connecting to help you achieve a better lighting solution. It is suitable for smaller places since the lights are brought and may cover an extensive location. There are high chances of using connectors when the site is vast. LED tape lights are the most suitable in this situation.
They allow you to easily connect several strips that combine to light up large sites, unusual nooks, and crannies. There are two effective ways to connect LED lights effectively.
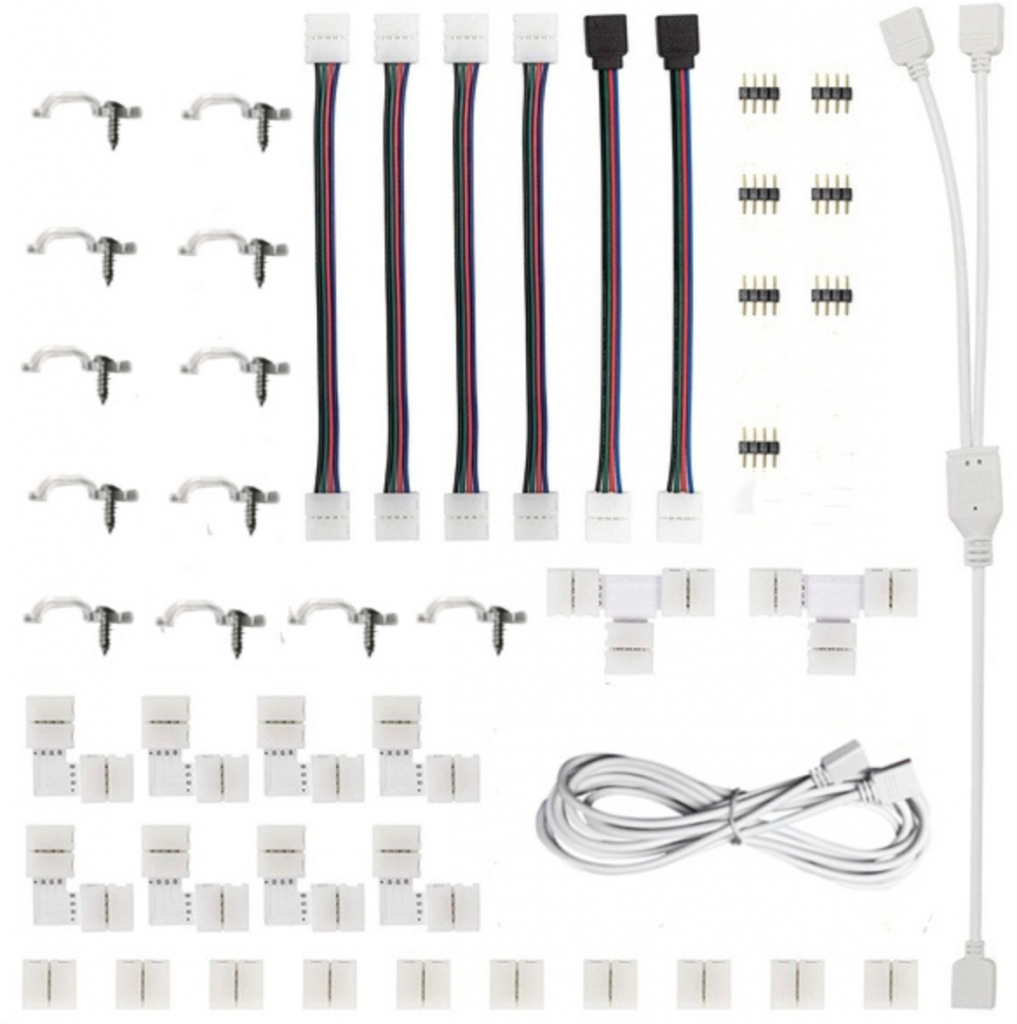
It is the most seamless and effortless way to connect your lights. Joining is made simple by the use of male to male clips. This process may take several forms, as explained below:
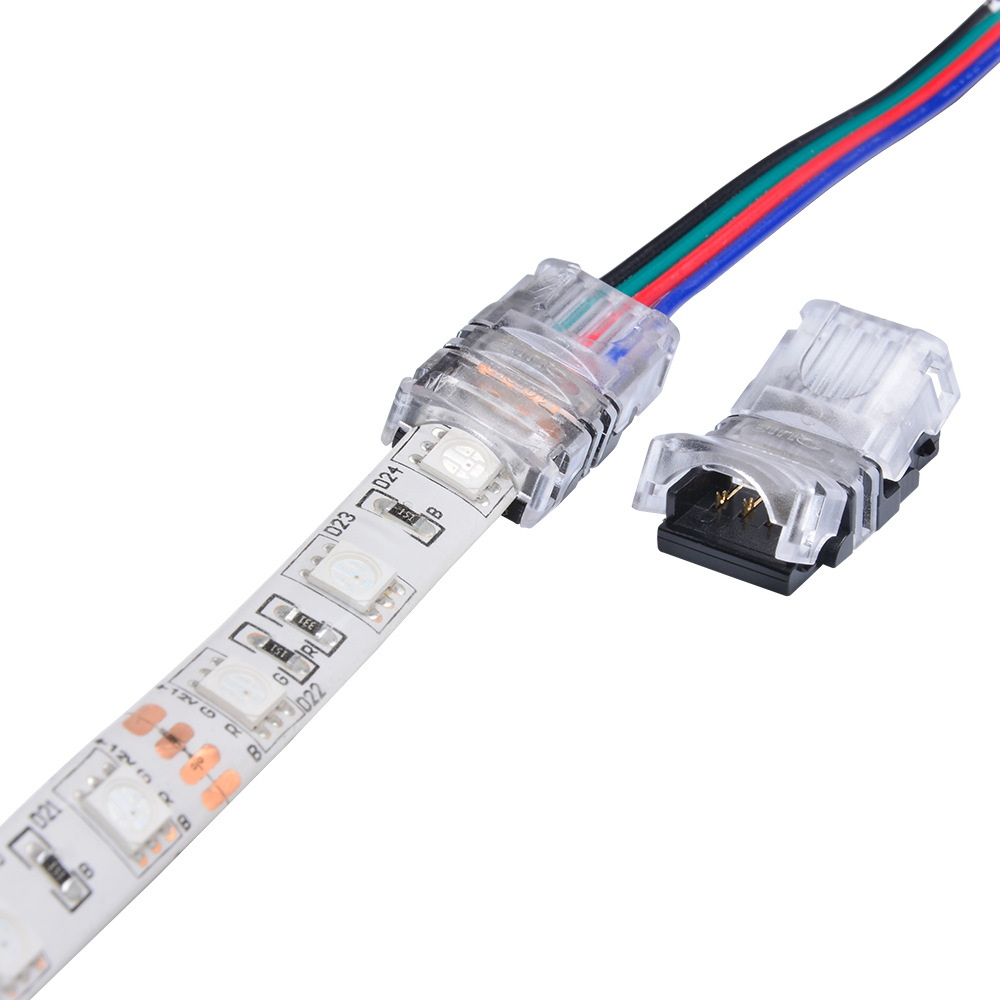
It would be best to use the Hippo Buckle LED Strip Connector when you want to join two LED strips. It has LED strips spaces on either side covering the two ends. You will install one end of the strip on the hippo buckle to easily connect the two strips. After installing your LED lights, the buckle will put your lights in place and remain firmly with no compromise.
The hippo buckle is used to connect two LED strips or connect it with a power supply. It is easy and convenient for both usage and offers you a guarantee of unique and adequate lighting. You will extend the distance of your lights effectively using the hippo buckle without any interruptions. The light strips you can connect with the hippo buckle are single colors and RGB LED lights.
Some lighting projects have unusual shapes and go round corners making funny shapes. You can make the best lighting project of this kind using the Solder-Free LED Wire Connector. They have clips that cover every end that enable you to place too many LED lights easily on either side. It provides a long distance when you want to extend your lights to be lengthy and cover broad areas.
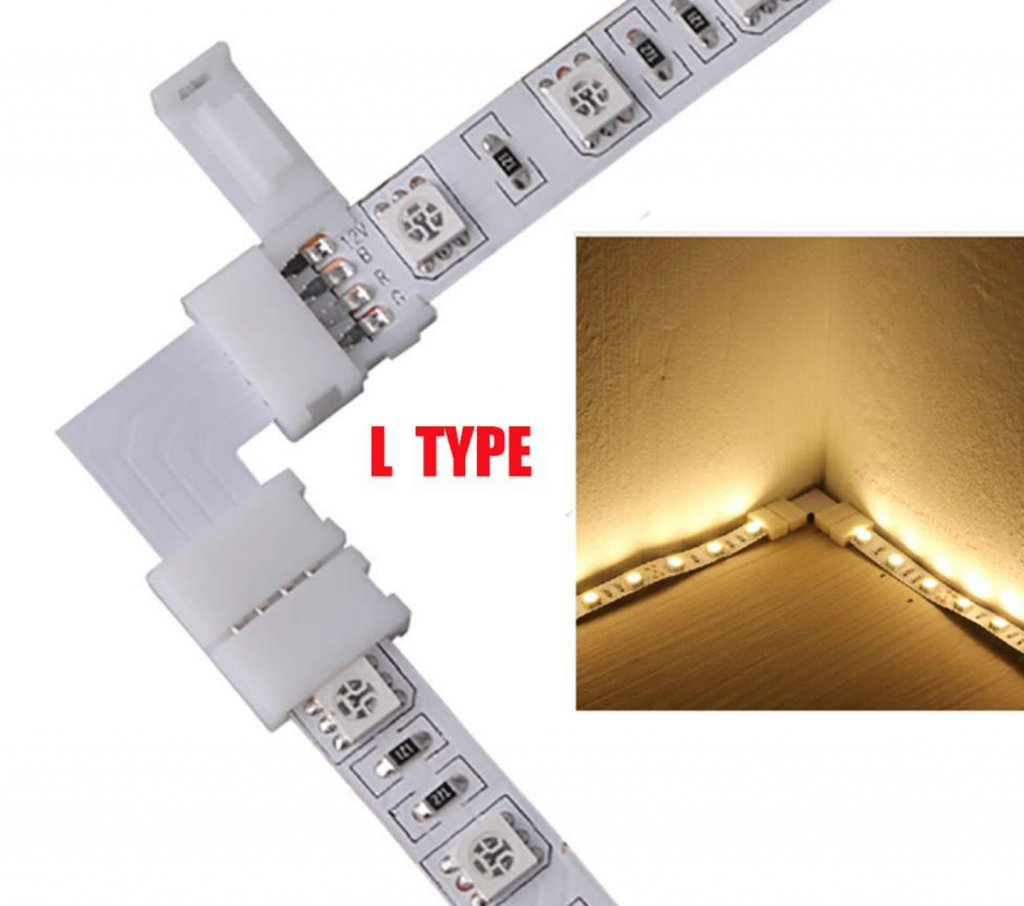
The wires are useful for use in corners and in other spaces where you will not require lighting. The cables are free, and you do not need to put any lights on them. The types of LED lights you can include are single color and RGB tape lights and combine them.
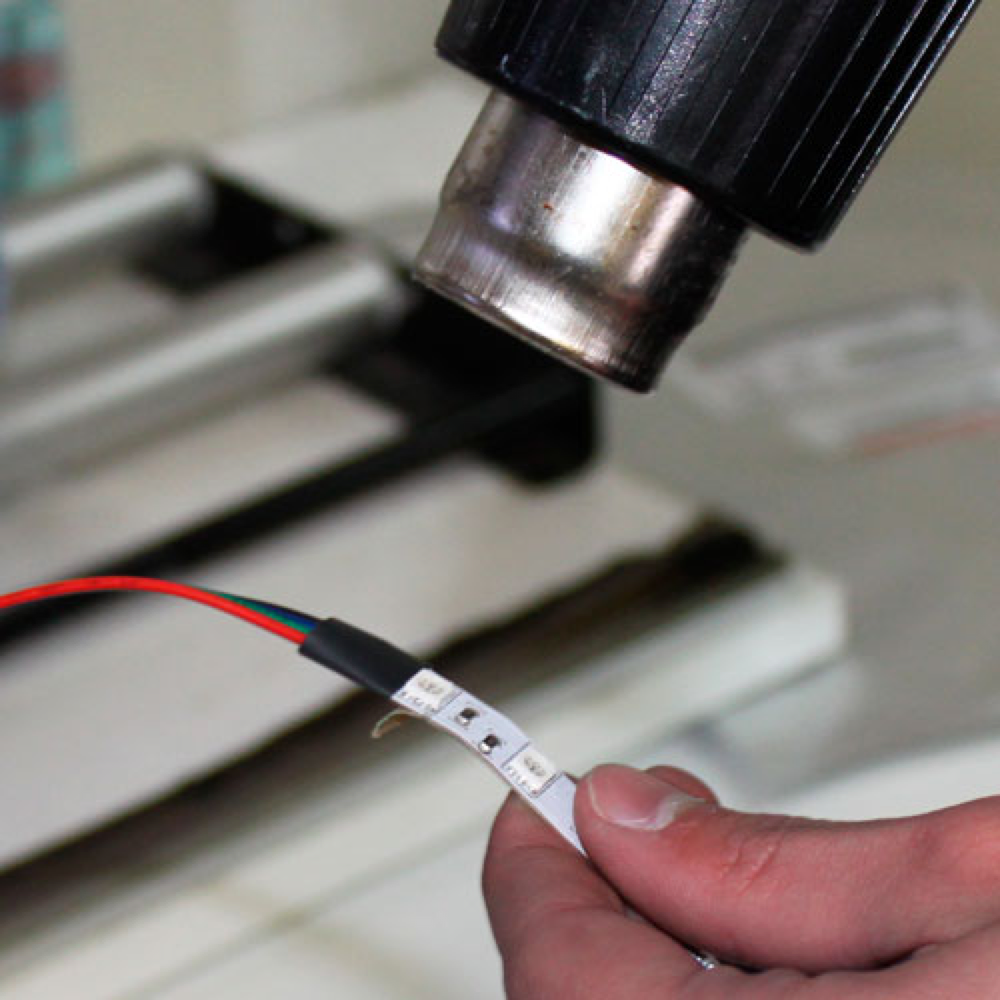
Sometimes you may find it is tough to use clips when making a lighting project. You may not be able to use clips to combine lights on surfaces like aluminum frames. In this case, you can use soldering to make your work impressive. Soldering the tapes is not tricky, and you can do it in simple, easy steps.
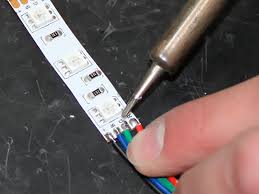
You will have to acquire machinery for the process and learn a little about how to solder wires. After getting your machine, you will get instructions on how you can achieve the process using your specialized equipment. Cut your strips in sizes before you solder them together. The dimensions of your strips will depend on any size you want to use.
You can join your strips by:
• Arrange the sizes cut together seamlessly.
• Remove the covering to expose the strip.
• Match the ends of both strips exactly
• Solder them together.
Depending on the method you use to join your LED lights, you can choose from either of the two processes involved. However, there is some work to be put into ensuring your job is practical and convenient. The factors you have to consider include:
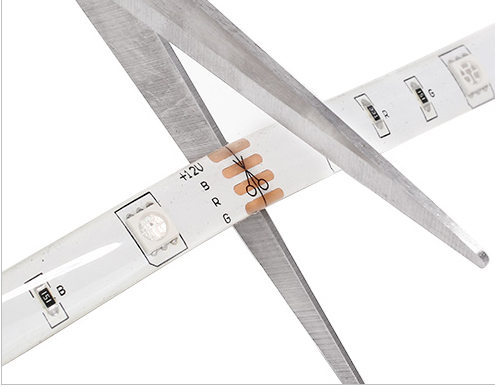
At this point of the LED wires, you will get around 2 inches in the tapes. You have to cut them carefully to avoid any damage to components and make your connectivity easily without looking for additional wires.
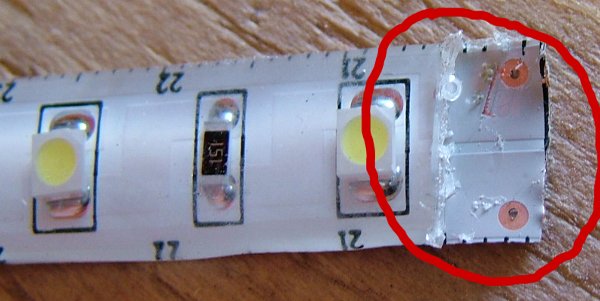
Remove the casing that is next to the copper connections carefully to expose the tapes. You will also need to expose the lettering to ensure sufficient work. However, you don’t need this process when you use hippo connectors.
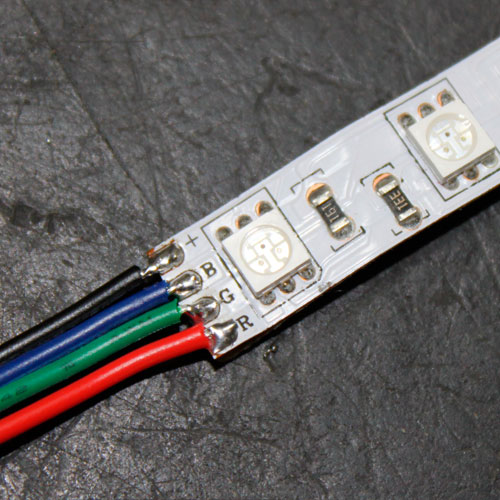
Matching the wires is very important to make your project a success. Always ensure before you connect a tape or wire; it would help to check the right cables that join on each LED strip. Green will connect to green, and red connects to red.
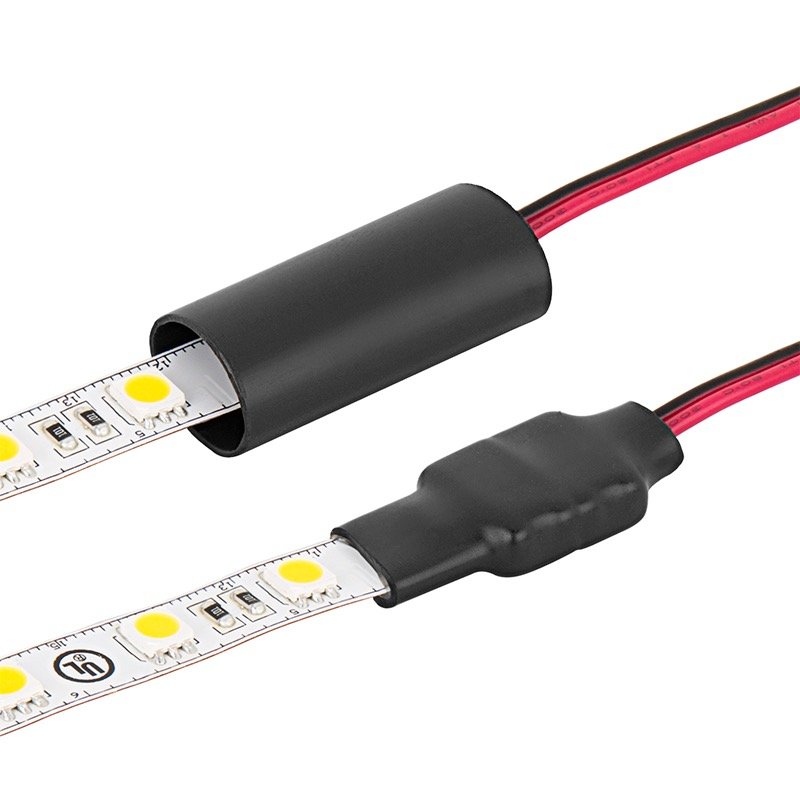
You have to protect the connections using heat shrink for durability. Different types of heat shrinks can be used outdoors and indoors. Get the right one for the job for the best service.
After you connect the LED lights, you will need to connect them to a power source to light them up. You have a plethora of ways to connect your LED lights to a power source, and you have to choose the most appropriate option for the task.
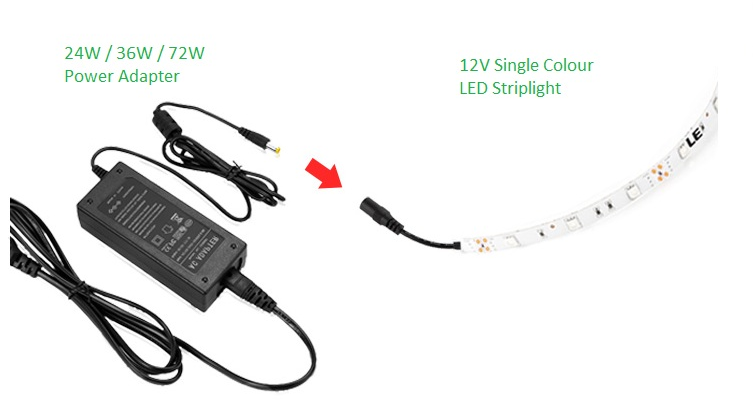
For small lighting projects, you can directly connect your lights to the socket. You can easily use clips to make the connection. You can also use a hardwire when you need to connect your LED lights to the primary power source in your house. It will help connect your LED lights to the primary power source when you have an extensive lighting project, such as in the office or huge buildings.
It is important to note that most LED lights use low voltage direct current. They revolve around 12v to 24v. Your power provider always labels the rate of the socket or main supply on it. Ensure it matches the rate of your LED lights before you make a connection.
If there is an under connection, your LED lights will work very low or not produce any light at all. When there is too much voltage, it will burn all your LED lights.
The power supply capacity must also be sufficient to provide enough power to light up the whole project. You can calculate this by checking the LED strip’s specifications; current or draw per length.
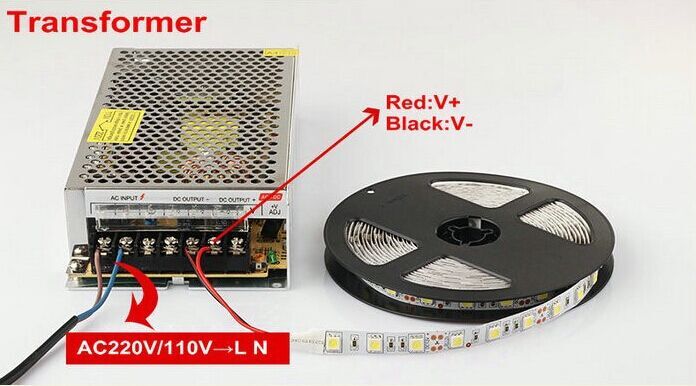
Your power supply and the LED strip must be physically compatible to make your connection a success. There are various connection types and power supply from manufacturers, and it cannot be obvious. You can use the chart below to breakdown your ways of achieving the right connection.
The power supply guide will help you determine the connections you use on every LED strip effectively. Use this guide to make a connection with the power supply and other accessories.
From the guide, you can determine the following:
• The DC of the power supply
• Connection type on the LED strip
• Ensure you make a complete connection
The positive end of the power supply connects to the copper pad’s positive end and likewise to the negative ends.
You can light all your project effectively using the LED light strips. They easily fit into tight spaces, unusual nooks, and very long distances to provide bright and fantastic lighting. LED lights don’t emit a lot of heat and hence low power consumption. They are very durable to ensure you cut down maintenance costs and the need to purchase lights often. As you have found out, they are also effortless to connect and fit any space or shape you need. Light up your holiday using the most effective and convenient LED lights.
Want to know more information about how to choose the led driver for the led strip, you can check this article: How to Choose the LED Driver for LED Strip Light.
For more details regarding installation and how to connect LED lights, you are welcome at Potato Lighting Blog. We provide light solutions to all European and US clients with over six years of experience in the field. Get free consultation services to form our contact team here.
LED NEON How is LED Neon made? LED Neon is made out of two important materials which are LED strip lights and silicon tubes. At

Dimming LED strip lights have become increasingly important for many lighting applications, from residential homes to commercial buildings. With traditional incandescent lights, dimming was achieved by

Lighting is one of the essential aspects that matter indoors as well as outdoors, so many things need consideration when choosing the kind of lighting

If you look at the variety of lights around you, you will have plenty of options to look forward to. Especially if you have seen

Smart LED lighting is a revolutionary and fascinating trend in the lighting industry. We have written all that you need to know about it in this post.

The aesthetics and functional application of LED Linear lights keeps expanding with technological advancement. Check out the reasons why LED Linear became people’s choice and it’s amazing future trends.